Using PowerPoint games are wonderful! They can truly enhance any lesson and kids love it. The first time I used one, my students were engaged the entire time! I know it was something I definitely wanted to invest in. If you’re unsure about using PowerPoint game, read “Getting the Most of out PowerPoint Games” here.
But did you know there’s more than one way to use them? I was messing around with some games and learned a few things I’d love to share with out. If you don’t have an interactive board, tablet, or Smartboard or a even a classroom computer, this is the post for you! Here are 5 ways to use a PowerPoint game.
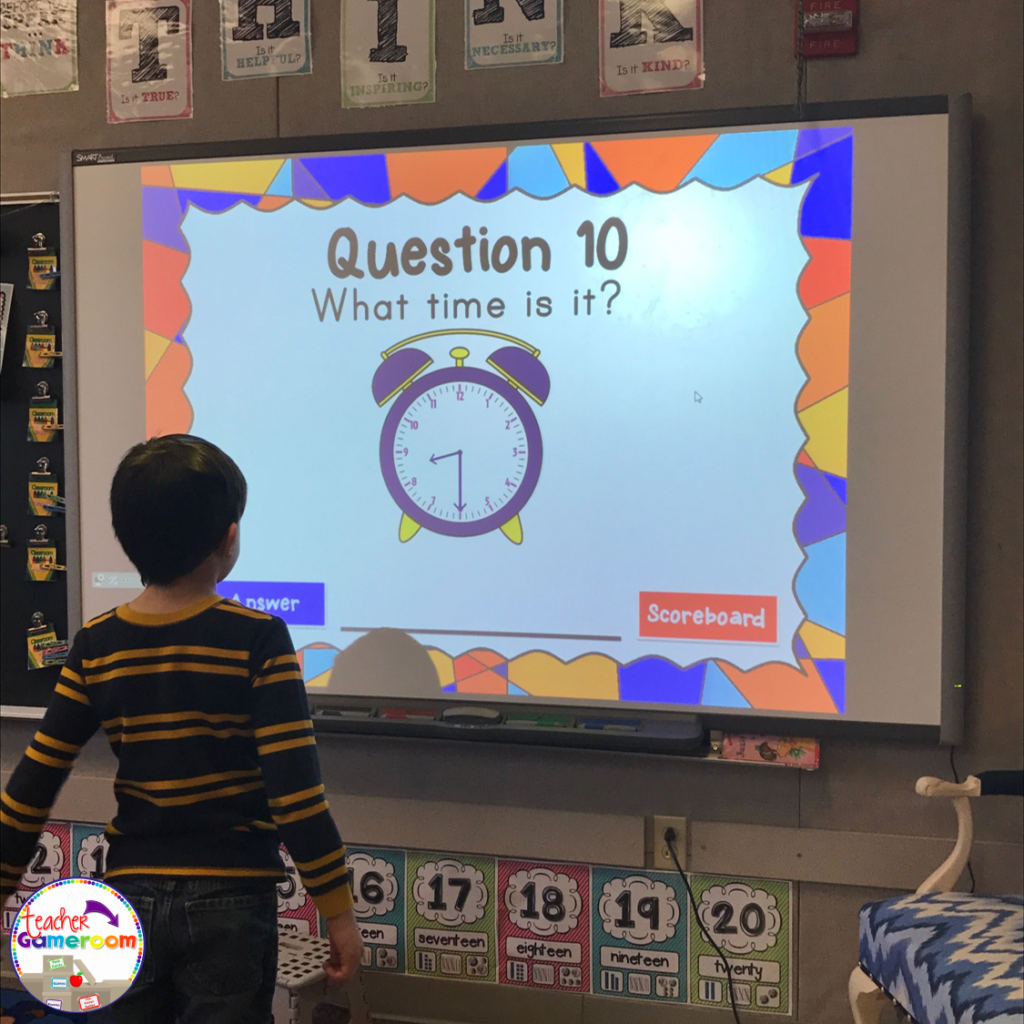
1.) The Traditional Way No explanation needed here. PowerPoint games can be used on any device that has Microsoft PowerPoint or Microsoft PowerPoint Viewer (FREE). Just load it up and your ready to go. NO PREP NEEDED. Such a timesaver and great for centers. Learn about this game in this blog post: Time to the Half Hour PowerPoint Game
2.) Exit Ticket If you use exit tickets, you’ll love this! Exit Tickets are questions given to students at the end of a lesson to test the knowledge and understanding of that lesson, usually in the form on 1 question on a small piece of paper. The student turns it in and later, the teacher checks it to see which of their students understood the lesson. Learn how to use EXIT TICKETS here: How to use Exit Tickets in the Classroom
You can use the questions from a PowerPoint game just for that! Print out one question for each day of the topic you’re teaching. Click on the print button and print “4 slides per page”. Make copies and cut them out. Use one question each day as an exit ticket. Most games I create have 20 questions. That’s a whole month’s worth of tickets for one topic!
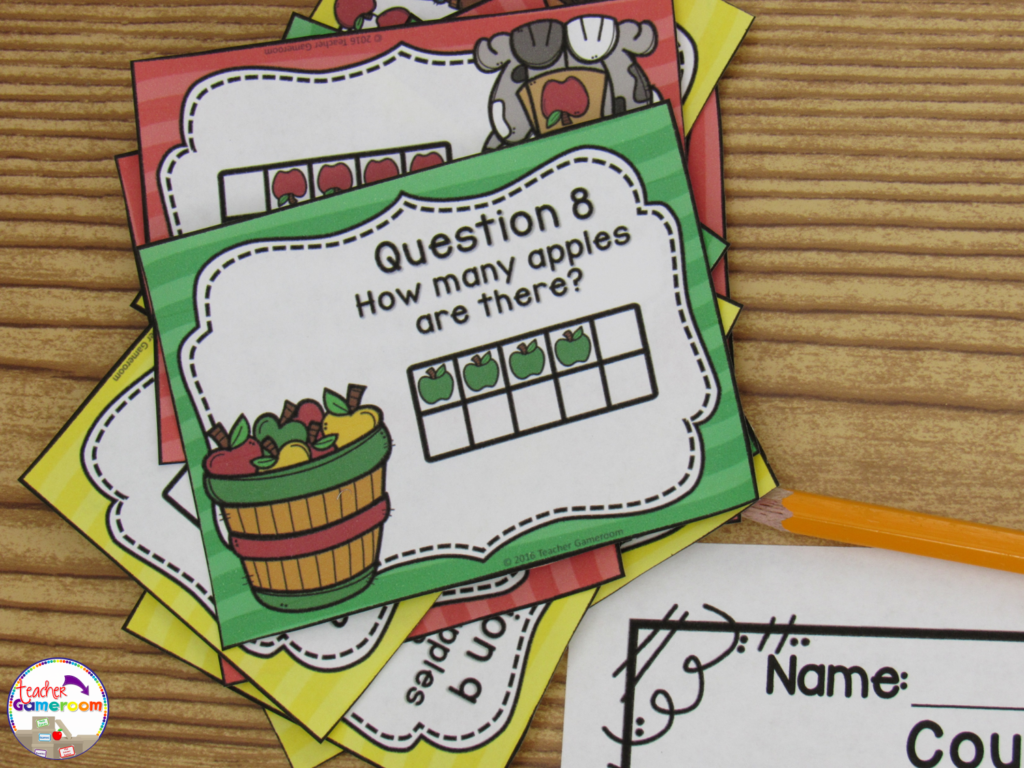
3.) Task Cards
Task cards are cards that have one question on each card. Students answer the question and write their response on a recording sheet to turn in to the teacher.
PowerPoint games can be turned into task cards with a just a few clicks. Did you know you can print PowerPoint games? You can print PowerPoint games by printing “Handout – 4 Slides per page”. Cut and laminate that cards. Store them in mini boxes or on book rings.
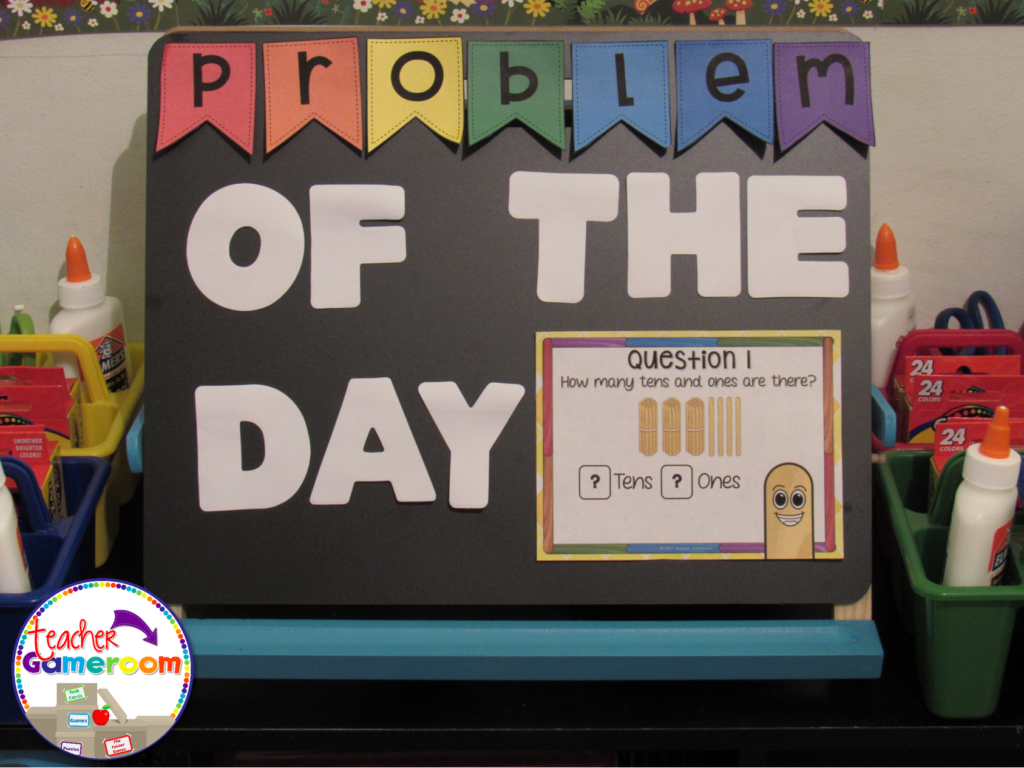
4.) Problem of the Day Conversely to exit tickets, you can use PowerPoint games questions as a problem or question of the day. Print and post each question before the start of any lesson. Print “Handout – 2 slides per page” in Google Slides.
5.) Scoot/Walk the Room Scoot is a popular game where students move from chair to chair answering a single question. Walk the Room is similar in that students walk around the classroom, finding and answering questions. You can print out questions and post them around the room and or on students desks. If you have student computers, you can still play! Students just move from computer to computer.
There are even more ways to use powerpoint games. Try some of these activities out with freebies in my store. Let me know how you use your PowerPoint games. If you need help with any of my games, I’d be happy to help!
The first day of school will be here before we know it and I can’t wait! The first day of school can be tricky and if you don’t take care, you could have a rocky start. With that in mind, I’ve learned a few things to do on that first day that will get the students thinking! One of my favorite is the Black Box Experiment.
When I did my student teaching some years ago, my mentor and I planned our first day out completely. One thing he did was the black box experiment. When I began my 2nd year teaching, I did this experiment with my 2nd graders. I filled a regular pencil boxes (the same you can get at the store for about $1, even cheaper right before school starts) with everyday school items. Mostly just some things I found around the classroom. Then I closed it and wrapped it in black bulletin board paper.
On the first day of school during science time, I pulled out the boxes. I had made about 3 to 5 boxes (enough for each table). I didn’t tell the students what was in it. They had to use their senses to figure out what was in the box. It was a great experience for them and for me as well.
When I did it with my mentor, we simply had the students write about it. When I did it with my 2nd graders, I created a worksheet where they could draw what they thought was in the box and write down their reasons. At the end of the day, I used their drawings and posted them on my bulletin board.
The answers the students gave were funny while others were spot on (I think everyone knows the sound of a coin). You can gain some insight into their thinking as well as get a sample of their writing and drawing. I remember one student thought there were cards in the boxes. Another thought there was a toy elephant inside!
Through the school year, I made references to that experiment, especially for my struggling students (making the analogy that even though we don’t know something, eventually we will figure it out aka open the box). At the end of the year, we opened the boxes and the students were surprised at what it was. Some were happy while others were disappointed. Next time, I plan to put small 2nd grade promotion certificates and small prizes inside the boxes! If you’d like to try this experiment in your classroom, you can purchase this set in my TPT Store. It gives you more details and plans out the entire lesson from start to finish.
Have a happy first day of school! Don’t forget to check out other great first day activities!
I love working with the 8 parts of speech, especially if I use School House Rock videos. To help assess want students learned (and to have a bit of fun) I made this wonderful game for my students to play.
This is great for a quick review since there are only 10 questions and is multiple choice. This is great for centers as students can take turns answering questions or you can use it a whole class review. I would choose a random student by drawing popsicle sticks and they choose a question.
Sometimes my students would go in order. Other times, they would pick a random number. Best part: once they’ve answered the question, it disappeared and I don’t have to worry about whether they’ve already answered it.
Each question gives students a sentence. The noun to be replaced is highlighted in yellow. Students must decided from 3 answer choices is best to replace the noun. X’s appear for wrong answers and checks appear for correct answers.
Practicing addition is a basic skill for kindergartners. This games reinforces those skills in a fun, interactive way.
This game is a teacher versus student game. The students answer all the questions and if they get the answer correct, they get the points, but if they get it wrong, I get the points! Great motivator! Who doesn’t want to defeat their teacher?
There are 20 questions in all. Students can choose 1 of 20 questions. Students are given an addition problem with an addend and a missing addend that equals to 10.
Students work out the problems and give their answer. They click on the “Answer Button” to see if they are correct. Then, they click on “Scoreboard” to choose another question to answer.
There are 20 questions in all. It even includes a type-in scoreboard that is used while in “Slideshow Mode.”
You can get this game here: Making Ten Powerpoint Game. Makes a great game for whole class, in small groups, or even for the substitute teacher. Here’s what other teachers are saying about this game
“My students LOVE this game! They beg to play every day. Thanks so much!”– Donnalyn T.
“Great resource to practice this standard. Perfect for leaving for sub.”– Kendria M.
Don’t forget to check out my other Making 10 games including seasonal and holiday themed games. Don’t forget to pin this for later!
A special thank you to Mercedes for taking these wonderful pictures for me!
When your working with puzzles, it’s always great to have a little guidance. Whether you’ve been teaching for 1 year or 10 years, it’s always great to have some extra help. Here are some tips and tricks for working with paper puzzle pieces.
Tip #1 – Gather your materials!
Let’s face it. There are not a lot of puzzles for subjects like the 3 Branches of Government or animal life cycles. Time to grab all the materials, clip art included, for the puzzle you’d like to make. Save some time by having the source materials with you for easy access.
Tip #2 – Find some puzzle pieces!
When you have your designs all figured out, it’s time to decide what type of puzzle you want. Do you want the traditional puzzle or something different. Maybe a two piece puzzle or even a 3 or 4 piece. I have a few free puzzle templates in my TPT Store.
Tip #3 – Use strong paper!
If you decide to create your own, print them out on some durable paper. I bought a pack of 75 white cardstock sheets from Big Lots from $2.50. The stronger the paper, the longer they will last!
Tip #4 – Laminate them!
Just about every school has a laminating machine. Once you’re done print and cutting them our, get them laminated. Laminating the cards will help them last much longer. If your school doesn’t have a laminator, simply take them to Office Max, Staples, or a postal store (like Postal Annex) and have them laminated there, though it can get a little pricy.
You could always buy your own lamination machine. They can run anywhere from $20 to $100, depending on the model and make. I bought mine from Wal-Mart for $45 (including the 20 thermal pouches). They do sell starter kits for $20 which includes 3 pouches.
Tip #5 – Store them!
Now your cards are ready for student use, but where to store them? I’ve seen teachers store them in soap bar boxes from the dollar tree. Others have them in plastic bags with rings. If you’re on a budget, I’d go for the latter. You can buy plenty of zip-lock sandwich bags and label them accordingly.
Tip #6 – Buy them
If all else fails, buy them already made! Time is always a factor. If you need it by Friday and it’s already Wednesday, you may have to buy them yourself. There are plenty of sellers on TPT with tons of puzzle pieces sets.
Tip #7 – Teach Kids to handle with care!
One of the most important tips is to teach your students to handle the puzzle pieces with care, especially if you made them. Whether you plan to use them 1 time or 100 times, students should know that these pieces need to be taken care of properly so that student next year can enjoy them too.
I hope you found these tips useful in your classroom. Don’t forget to stop my TPT store for some printable puzzle pieces!